My Linen Closet Makeover
One of my goals this year is to organize my home in a way that actually makes sense for how we live. It doesn’t have to be perfection, Pinterest-level, just more functional. I decided to start with one of our most used (and most ignored) spaces: our linen and storage closet.
This closet holds a lot. Towels, extra bedding, cleaning supplies, backup toiletries, random household things… basically anything that doesn’t have a better home. Because of that, it slowly turned into a space where things were just stacked wherever they fit. Every time I opened it, it was hard to find things… I knew it needed some love.


Here’s How I Did it:
Before doing anything, I had to think through how I wanted the space to work. Not just how I wanted it to look, but how we use it day to day. What do we reach for the most? What ends up shoved to the back? What’s been living here simply because there wasn’t a better place for it?
Taking a few minutes to answer those questions made the whole process feel less overwhelming. It gave me a loose game plan before I started pulling everything out, which made grouping things together feel more intentional instead of random.


Step 1: Pull Everything Out
I took everything out of the closet so I could see what I was working with. It was slightly chaotic for a minute, but necessary. This made it obvious what we had too much of, what we never use, and what didn’t even belong in this closet in the first place.
I donated a few things, tossed some old products, and immediately felt lighter just from editing it down.


Step 2: Group Things Together
Since this closet holds so many different types of items, grouping was key. I separated everything into loose categories like towels, extra bedding, cleaning supplies, and backstock items. Once everything was grouped, it was easier to decide where things should go and what size containers would be appropriate.
I also thought about what we grab most often. Towels and everyday items stayed within easy reach, while things we don’t need as often went higher up.


Step 3: Choose Storage That Makes Sense
Once I knew what was staying, I focused on containers. I picked up a bunch of matching baskets from HomeGoods in a few different sizes so everything would feel cohesive, but still fit what it needed to hold.
I also grabbed a few small plastic containers with lids from IKEA for things that needed to stay contained or stacked neatly. For cleaning supplies, I added a couple of clear drawers so I could see exactly what we have and grab things quickly.
That said, I’m pretty picky about clear containers. I only like using them when everything inside looks the same — like cleaning tablets or refills. For anything visually messy, I much prefer a basket that hides it and keeps the space feeling calm.
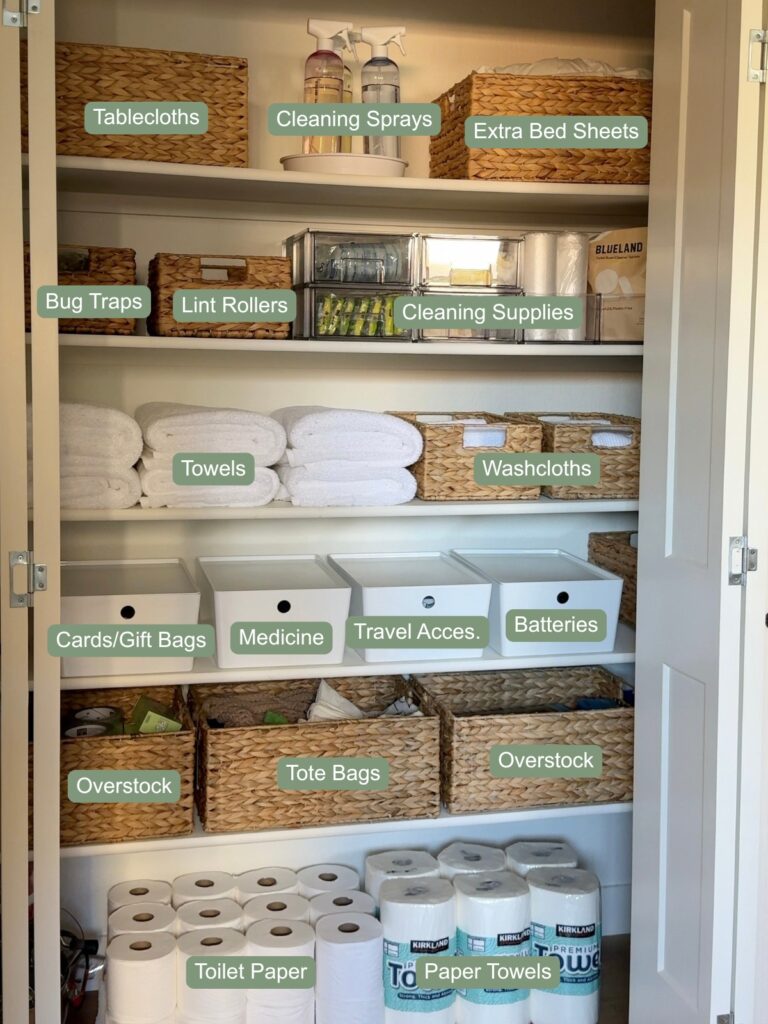
The After
I’m really happy with the way it turned out! I played around with the layout for a bit, and this is how things made the most sense for us. Everything has a home, and now, when I open this closet, I can find what I need without digging. It feels like the space is finally working with us instead of against us.
High-traffic spaces are always worth it! Stay tuned for the next area on my list.